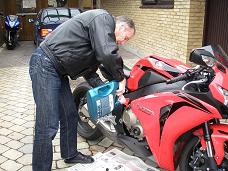
This DIY article describes how to change oil and oil filter on a 2008 CBR1000RR Honda motorcycle and is to the best of my knowledge also applicable for 2009 and 2010 models.
This is an easy DIY task. A first timer may spend 2 or 4 hours doing it, an experienced around 40 minutes.
Be patient when fidelling arround with the plastic tabs on the cowls. Honda has made a very clever "snap them together" system, which is easy to dismantle and reassemble if you do it right. Read more about this in the referenced DIY article (see step 2 here below).
Tools needed:
Spare Parts and Consumables:
Note 1:
Honda recommends Honda "4-stroke motorcycle oil" or an equivalent.
API clasification: SG or higher (except oils labled as energi concerving on the
circular API service label), viscosity: SAE 10W-30 (or 10W-40 in hot climates),
JASO T 309 standard: MA.
I used Castrol Power 1 GPS 4T, SAE 10W-30, API SJ, as recommended by my local Honda
dealer Aagesen Motorcykler.
1) Put the bike with warm engine on side stand and place tape over the ignition key hole.
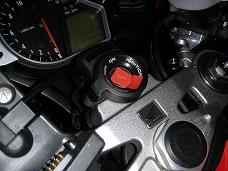 The tape is there to signal: "don't start the engine!"
2) Remove the lower cowl - click here for DIY article on this.
3) Remove the screw holding the rear end of the right middle cowl.
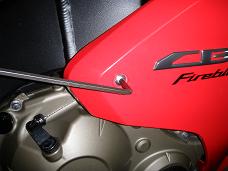
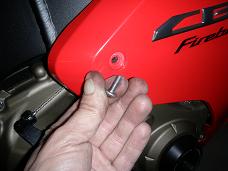
With this screw off and the lower cowl removed, the right middle cowl will now be so
flexible that you can easily access the oil filter.
4) Remove the oil filler cap.
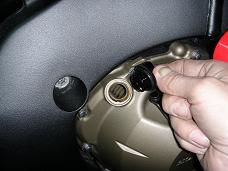 This allows air to enter while oil is
drained.
Now is the time to spread out a good layer of old news papers under the engine to
collect spill over in the next step. The rule here is better safe than sorry!
5) Unscrew the oil drain bolt and sealing washer and drain the oil.
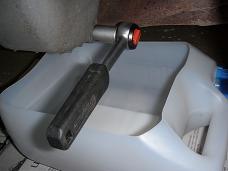
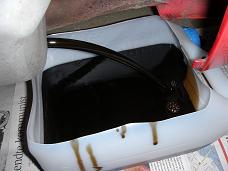
Use gloves to protect your skin. Use one or two old plastic containers you have cut open,
to collect the oil which will come pooring out as you can see on the picture.
6) Unscrew the oil filter cartridge using the oil filter wrench.
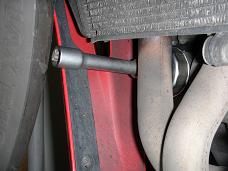
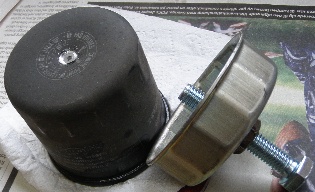
Notice how a long bolt was used to get the wrench separated from the old oil filter.
Be prepared to collect oil spill from the filter when it comes loose.
I ran into some difficulty here: The oil filter would not come loose. Either because it was tightened too much when it was mounted or because the rubber O-ring seal had burned itself stuck to the metal surfaces.
First I used a hammer on the top spanner to get it loose. Then I tried with a pressurized air tool, but this was to much for the oil filter wrench, on which the nut broke off!Fortunately I learned a good trick many years ago: simply punch a screw driver through the filter and use that to loosen it.
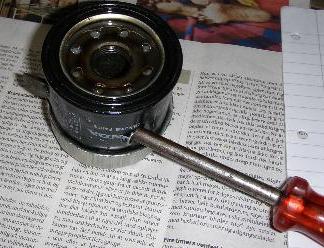
The inner end of the oil filter is easy to access from the right side of the bike. First I punched two small holes in the side of the oil filter with a distance around 8 mm using an awl and a hammer. Then I punched a big flat screw dricer through these two holes and all the way through the filter out on the other side. I did it with a suitable offset from center in order not to hit the center threaded boss on which the filter is mounted. On the left picture here below you can just see the tip of the screw driver has come out on the other side of the oil filter.
Several hard blows on the screw drivers handle with a heavy hammer got the filter loose, and I could then screw it off with a pair of pliers.
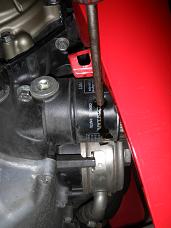
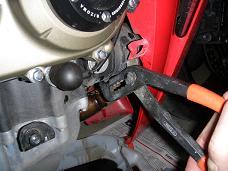 Loosening and
unscrewing filter
Remark: When doing the next oil service at 24.000 km I had repaired my oil filter wrench with a properly welded nut, so it would not once again break under load. Using quite strong hand force was not sufficient, so I used my pressurized air tool which in about one second got the filter loose. If you do not have an air tool simply use a hammer to get enough vibration and torque.
7) Remount the oil drain bolt with sealing washer, Tourge: 30 Nm (3.1 kgfm,
22 lbfft).
Remember to clean the bolt and washer well, and smear both with engine oil before mounting.
The old sealing washer may be reused one or two times if in good condition. The washer
is made from cobber and will become harder and harder each time it is mounted. Before
it gets so hard that it will not seal correctly, it must either be replaced with a new
one (or softened by heating it up to glowing temperature and cooled down slowly).
Be sure to tighten to the specified tourge.
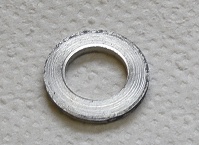
And "why should I use a new washer?" you might ask. Because the cobber in the
old washer has deformed and hardened when the oil drain bolt was mounted. And - if used
again - it may be too hard to form a tight oil seal. Furthermore the washer has probably
corroded somewhat during use. On the picture below of the old washer , you can clearly
see both deformation and corrosion.
8) Check the length of the oil filter mounting boss.
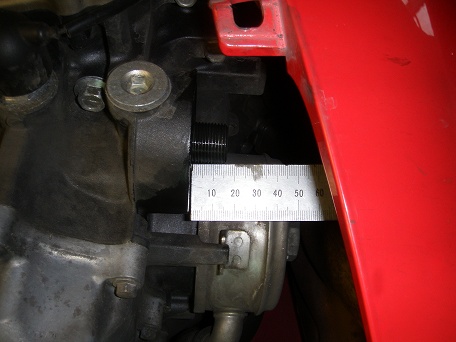 The boss should protude
15.4 - 16.4 mm (0.61 - 0.65 in) from the cranckcase.
The Honda Shop Manual does not specify what to do if the length i incorrect, but from what I can see from the construction, the boss might have come loose when you unscrewed the oil filter, and it might have been screwed partly out of its mounting hole. Simply make sure you get it reinstalled into the correct position (and use thread locking compound).
9) Install a new Oil Filter Cartridge, Tourge: 26 Nm (2.7 kgfm, 19 lbfft).
Before you mount the filter, smear the O-ring and the thread width engine oil. Also fill
up the filter cartridge width engine oil and empty out so much that you can mount the
filter without spilling oil all over your bike and floor. This oil will reduce the
time it takes to for up oil pressure when you start the engine. Be sure to tighten to
the specified tourge. In case you don't have a torque spanner, screw it in as hard as
you you would be able to by hand-force only without any tool.
The oil filter wrench might get stuck on the oil filter so you can not right away pull
it off. If that happens you can get it loose with a few light strokes of a hammer on the
edge of the oil filter wrench. The strokes should be in the forward direction.
10) Fill cranckcase with recommended engine oil using a funnel.
First fill up with 2.0 liters. Then repeat filling up with just a small amount and
checking if you have reached the correct level.
The level must be measured with the bike in upright position! Unscrew the dipstick,
take it out and wipe it clean. Insert it to the point where the thread begins but do not
turn it. Take it out and inspect how much up the dipstick it has reached. The level should
be somewhere between the two markings on the dipstick.
Important: Be sure not to overfill as this might cause serious damage to the
engine.
11) Install the Oil Filler Cap.
Remember to check that the O-ring is in good condition.
12) Cleanup and Check for Oil Leaks.
13) Reinsert Screw in Right Middle Cowl.
14) Remount Lower Cowl - click here for DIY article on this.
15) Check Oil Level following the procedure in the following section.
Important: Be sure to use the following procedure recommended by Honda for oil level chek as oil level is highly dependant on several factors: engine temperature, correct upright position of bike, time from engine is cut off to doing the measurement.
Finished.
Please participate with review, questions and discussion via this
thread on
www.fireblades.org,
or via this thread on
www.cbr1000rr.net.
See also:
How to DIY (warnings, tips, tools,
methods, ... etc.)
First Year
with my Fireblade
Buy Car and Motorcycle
Superbikes on the Road: BMW S1000RR versus
Honda CBR1000RR Fireblade - (partly finished)
© Copyright 2010 FireBladerDk - Last updated 2010-10-26