
This DIY article describes how to inspect and service the clutch system on a 2008 CBR1000RR Honda Fireblade motorcycle and is to the best of my knowledge also applicable for 2009 and 2010 models (in fact the principles are applicable for almost any kind of motorcycle).
The clutch system service must according to the mainteneance schedule be performed every 6000 km (4000 miles), but it is a good idea to do it every 3000 km to improve the life span of the clutch cable, and at least one time per year just before winter hybernation.
This is a very very easy DIY task. A first timer may spend 20 to 30 minutes doing it, an experienced around 10 minutes.
Tools needed:
Spare Parts and Consumables:
1) Release and adjust the clutch adjuster to maximum slack cable.
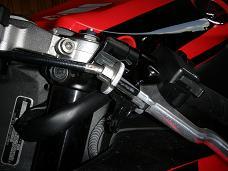
Release the large disc shaped locking nut and turn the adjuster as far in as possible.
Allign the slots in the adjuster with the slot in the clutch lever.
2) Pull the clutch cable out and release it from the clucth lever.
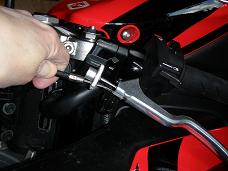
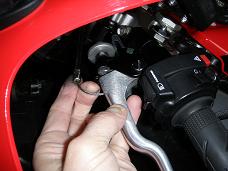 .
.
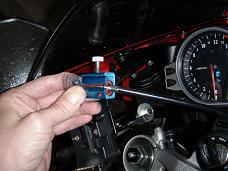
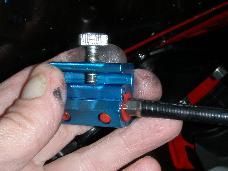
3) Mount the cable luber on the clucth cable.
 .
.
Tighten the screw to get a tight fit on the cable. In case you have difficullty
getting it tight, use a few turns of insulation tape around the cable as seal.
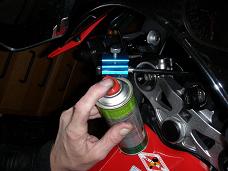
4) Lubricate the clutch cable.
 .
.
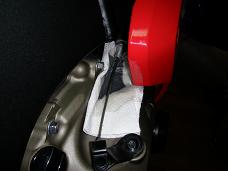
Lubricate generously to flush metal particles out of the cable. Use a cloth to collect
the oil comming out of the cable at the engine. Also lubricate the last part of the
cable untill the point where it is attached to the clutch lifter lever at the engine,
and lubricate the joint at the end of the lifter lever.
5) Remount the clutch cable.
6) Adjust clutch lever freeplay to between 10-20 mm.
The freeplay is measured at the end of the clutch lever. Pull the lever gently untill
the point where it actually starts to pull the clutch (the required force rises sharply).
Then release it and notice how large a distance the end of the clutch lever moves. It
should be between 10 to 20 mm. If needed, adjust the adjuster screw by first releasing
the lock nut and then turn the adjuster screw untill the freeplay is within correct
range. Then tighten the lock nut with a pair of pliers to a moment slightly larger that
you could do by hand only.
OBS: Make sure the adjuster screw has engaged at least 5 turns into the threads on the
handle (if it is to far out it may be damaged during use).
In case correct freeplay can not be achieved in this way, you must make a major
adjustment at the clutch lifter lever on the engine (see the above right picture).
Loosen the lock nut and turn the adjuster screw to achieve correct freeplay, then
tighten the lock nut.
7) Inspect the clutch cable along its length.
Check that it mooves freely without kinks or sharp bends when you turn the steering
handle. Check for wear holes in the outer protection layer. The clutch cable on the
Fireblade is quite thick and strong, so it will endure many miles/kilometers before it
wears out. If you at any time suddenly have to adjust the freeplay often, it might be a
symptom of breaking strands in the wire which must then be replaced.
Normally I only write about DIY work I have done myself, but I will make an exception here, since it is expectedly a very simple task if you just remember this one principle: Always route the new cable into correct place by first attaching it to the end of the old cable with a short piece of string and then pull it into correct place when you pull out the old cable.
Finished.
You are invited to participate with review, questions and discussion via this thread on www.fireblades.org.
See also:
How to DIY (warnings, tips, tools,
methods, ... etc.)
First Year
with my Fireblade
© Copyright 2010 FireBladerDk - 2010-05-26