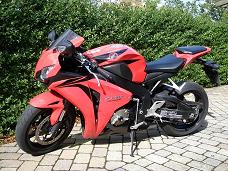
This DIY article describes how to replace rear brake pads on a 2008 CBR1000RR Honda Fireblade motorcycle and is to the best of my knowledge also applicable for 2009 and 2010 models.
The rear brake pads on a CBR1000RR typically need replacement every 15-25.000 km, depending, off course, on your driving style on streats. I don't know how long they last on race tracks. If you know this, then please write about it in a forum thread - see links near the bottom of this page.
Don't ever wait too long. If you do, you will one day suddenly hear a rough sound of metal scratching against metal when you brake, and the braking ability will be poor. The hardened surface on the brake disk will be scratched and in principle need replacement. Expensive Lesson!
It is normally OK to replace front and rear pads independently of eachother, but if you are in doubt, just replace both ends. The spare parts are not very expensive and the hours come for free when you DIY.
Your daily inspection should include a check of the brake fluid level in the reservoirs. Any sudden drop in this level will indicate that there is a serious leak in the system and immediate inspection and service is required. As the brake pads are worn down, the level will gradually fall and a low level means that the pads are probably due for replacement.
The DIY article Brake Pads Wear Inspection describes how to determine if it is time to replace the bake pads.
If the pads have large difference in remaining thickness, this indicates that the caliper is not able to slide freely from side to side on the caliper pins as it should. This could be due to rust or dirt on the pins which should hence be serviced (subject for another DIY article).
This is an easy DIY task. A first timer may spend 15 to 20 minutes doing it, an experienced less than two minutes (not including the time needed to find the proper tools). If you are not already an expert in DIY work you might also benefit from reading the How to DIY (tips, tools, methods, ... etc.) article.
Spare parts needed:
Tools needed:
Tips
When doing DIY work you will undoubdtedly at some point run into troubles like e.g. stuck bolts or other things which will not come apart. Instead of just spinning out of control using the big hammer, have a look in the " Undoing Stuck Bolts, Nuts and other Metal Parts" section.
Safety:
If you keep the brake disk and the brake pads clean and well away from any oil or grease contamination, this is a simple and safe DIY task, and your brakes will work perfectly afterwards. Should you in any way feel that the braking efficiency has degraded, you must of cause be a critical judge of your own work, and recheck your work until the job is right. Brake pads that have been contaminated with oil must either be replaced with new pads or ground sufficiently down with sandpaper.
1) Wash your hands to be sure the brake disks and pads are not contaminated with any greasy stuff.
2) Push the brake caliper as far as it will go towards the rear wheel.
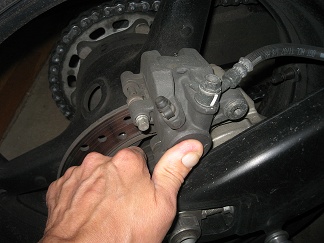
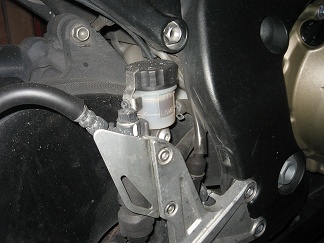
You may need to use both hands for this. Keep the pressure steady for the time it
takes to push the piston back into the calliber and the brake fluid back into the
reservoir which you should be watching so it does not overflow.
3) Unscrew and remove the pad pin.
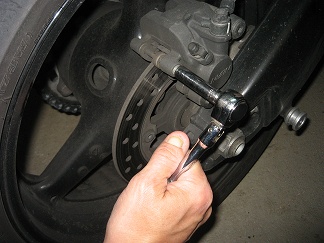
4) Pull out the brake pads.
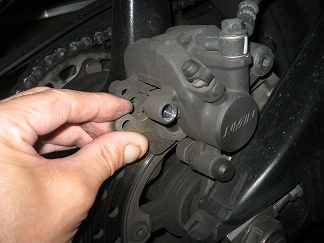
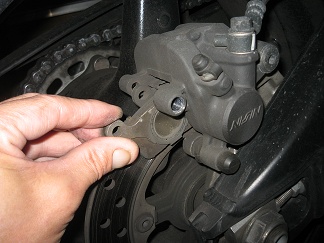
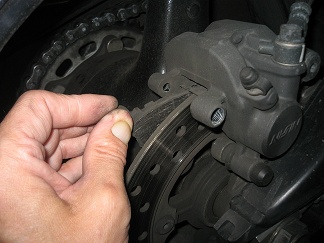
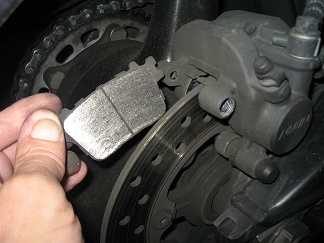
The pads can be pulled out towards the rear with very little force. Notice how
you get them out, because later you must be able to reverse the procedure when
mounting the new pads. You will be able to feel a spring effect pressing the pads a
little downwards. That is the pad spring which is located inside the caliper.
Normally it will stay in place while you remove the brake pads, but the Honda Shop
Manual says that you must make sure the pad spring is in correctly in place.
As I have not tried to fiddle around with the pad spring myself I can not say how
likely it might be to fall out or dislocate.
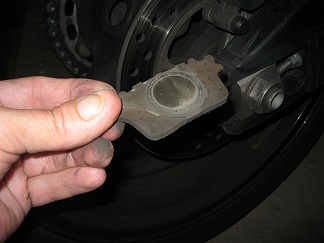
5) Transfer the back side plates from the old pads to the new pads.
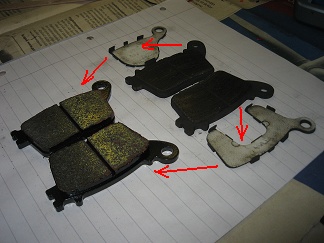
Each brakepad has a cover plate (metal) and a heat protection sheet (rubberlike material)
attached to its rear side. This plate together wit the sheet must be transferred from
the old pad to the new pad before installing the new pad into place.
6) Check that the pad spring is correctly in place and clean the inside of the
caliper.
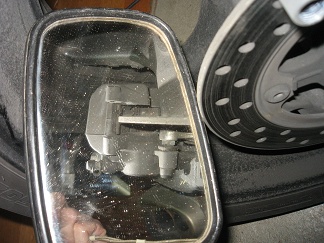
See my remarks about pad spring location in previous step number 4.
According to the Honda Shop Manual it is especillay the area arround the caliper
piston which should be cleaned, but here at the first brake pad replacement at
24.000 km I did not see a need for cleaning. If you see dirt a soft brush and/or
pressurized air may be used, but be carefull not to inhale the dust blown out. In old
times that woud be harmfull asbestos dust, and whatever they use now it should best
not be inhaled.
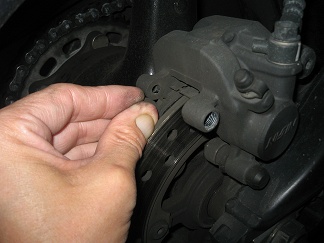
7) Insert the new brake pads into the brake caliper.
8) Remount the pad pin.
Coat the stopper ring on the end of the pad pin with a little silicone grease, and
smear the threads with a little cobber grease before you mount the pad pin. Tighten
to a torque of 18 Nm (1.8 kgfm, 13 lbfft).
9) Operate the foot brake lever a couple of times to make the brake piston settle
into place. The foot brake lever should now feel normal and hard.
Take the bike on a test drive. After a few brakings, the brakes should function and
feel normal.
Finished.
You are invited to participate with review, questions and discussion via this thread on www.fireblades.org or this thread on www.1000rr.net.
See also:
How to DIY (warnings, tips, tools,
methods, ... etc.)
First Year
with my Fireblade
Superbikes on the Road: BMW S1000RR versus
Honda CBR1000RR Fireblade - (partly finished)
© Copyright 2010 FireBladerDk - 2010-10-17