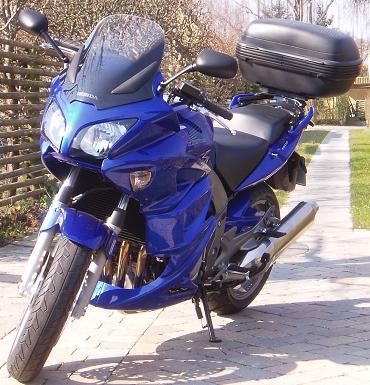
This DIY describes how to replace rear brake pads on a 2007 CBF1000A Honda motorcycle and is applicable for 2006 to 2009 models.
The rear brake pads on a CBF1000A typically needs replacement every 10.000 to 20.000 km, off course depending on your driving style and how close to the vear limit you go. I changed the rear brake pads on my CBF1000A first time at 13.000 km and second time at 35.000 km.
Don't ever wait too long. If you do, you will one day suddenly hear a rough sound of metal scratching against metal when you brake, and the braking ability will be poor. The hardened surface on the brake disk will be scratched and in principle need replacement. Expencive Lesson!
It is normally OK to replace only one set of pads at a time, i.e. rear or font pads, but if you are in doubt, just replace both ends. The spare parts are not very expencive and the hours come for free when you DIY.
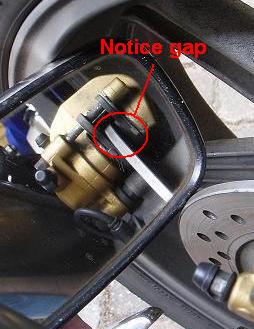
Visually inspect the thickness of the brake pad material on both sides of the
rear brake disk (image below).
If less than 1.5 mm is remaining on either side, it is time to do the replacement.
If the pads have large diference in remaining thikness, this indicates that the caliper is not able to slide freely from side to side on the caliper pins. This could be due to rust or dirt on the pins which should hence be cleaned and smeared lightly with silicone grease (subject for another DIY article).
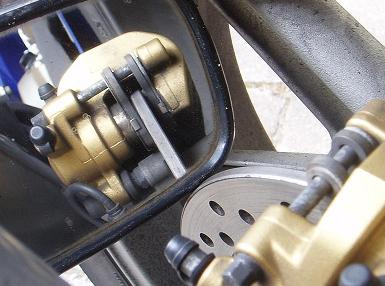
Using an old side mirror to inspect thickness of linning material.
This is an easy DIY tasks. A first timer may spend 1-2 hours doing it, an experienced arround 30 minutes. At some point you might also benefit from reading the How to DIY (tips, tools, methods, ... etc.) article.
Spareparts needed:
Tools needed:
Tips:
When doing DIY work you will undoubdtedly at some point run into troubles like e.g. stuck bolts or other things which will not come apart. Instead of just spinning out of control using the big hammer, have a look in the " Undoing Stuck Bolts, Nuts and other Metal Parts" section.
Safety:
If you keep the brake disk and the brake pads clean and long away from any oil or grease contamination, this is a simple and safe DIY task, and your brakes will work perfectly afterwards. Should you in anyway feel that the braking efficiency have degraded, you must of cause be a critical judge of your own work, and deem yourself to redo the work better. Brake pads that have been contaminated with oil must either be replaced with new pads or grinded sufficiently down with sandpaper.
First action is to wash your hands to be sure the brake disk is not contaminated with any greasy stuf.
Using hand force, push the brake caliper towards the rear wheel. Keep the pressure steady for the time it takes to push the brake fluid back into the container which you should be watching so you do not get overflow.
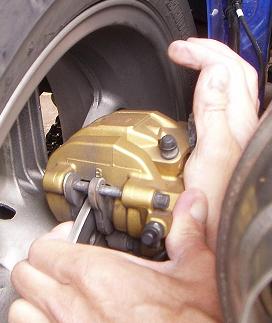
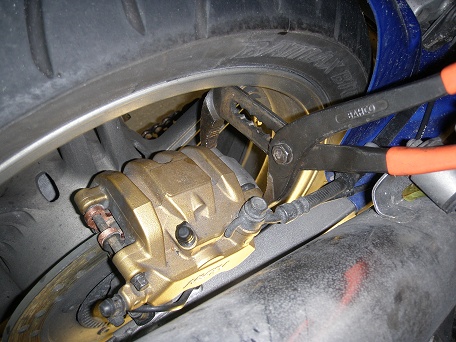
Pressing the pistons back by hand force to achieve a gap (above images left and right). If hand
force is not enough, use a helper or a pair of pliers as shown on the middle image above.
This is the time where you make sure nobody by accident applies the brakes on the bike while you are working. If that happens the pistons will be pressed out and eventually pop out!
When the pistons are fully back, unscrew and withdraw the pad pin (images below).
Withdraw and remove the brakepads (images below). While doing this, keep attention to how the pads were placed and how you get them out, because later you must be able to reverse this procedure, to mount the new pads into the same positions. Also make sure the pad spring (click on the right picture above to see it) remains in place while doing this.
Check that the caliper can slide freely from side to side on the caliper pins. Move it back and forth several times. Normally this should not present any problems, but if the caliper is stuck this must be delt with properly (subject for another DIY article).
Both brakepads will have a cover plate (metal) and heat protection sheet (properly a cheramic material) attached to their rear side. These shall be transferred from the old pads to the new pads before installing the new pads into place. When this is done, coat the stopper ring on the end of the pad pin with a little silicone grease.
Apply some copper-grease to the pad pin threads and remount it using a tourge of 17 Nm (1.7 kgfm, 13 lbfft).
Operate the brake pedal a couple of times. It should feel normal and hard, and
not soft to tread.
Take the bike for a test drive. After a few brakings, the brakes should function
and feel normal.
Finished.
The thread Brake Pads - Rear, Replacement - DIY Article on www.cbf1000.com may be used for comments and feed back, or you may mail directly to me (mail addres is on the front page).
© Copyright 2009 FireBladerDk - Last updated 2020-08-09