 .
.This page describes how to remove and reinstall the lower cowlings on a 2007 CBF1000A Honda motorcycle and is applicable for 2006 to 2009 models.
Remark: It has been brought to my attention by Dunelm on www.cbf1000.com that I
should probably have used the term fairing rather than cowling, but the later
has now 'infected' so many places on these DIY pages, that we have to live with it - sorry
 .
.
Althoug a couple of the mountings are common with the upper cowlings,
it is possible to remove/install upper and lower cowlings independently of each other. There
are a number of different manufactures of lower cowlings for CBF1000A, so some difference
might be expected between the various types. At the end of this article I have included
descriptions received from other CBF1000 owners having different types of lower fairings
installed.
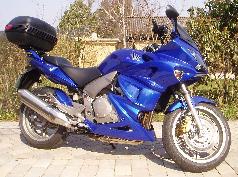
This is an easy DIY task, but be prepared for some fidelling arround with one of the bolts when reinstaling. A first timer may spend 1 hour doing it, an experienced arround 20 minutes.
Tools needed:
Removal of the left lower cowling is shown below. Removal of the right lower cowling is similar.
1) Remove the 20 mm long 6mm bolt with plastic sleave at the upper rear corner of the
cowling.
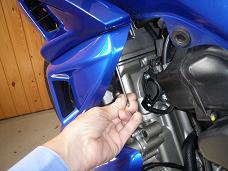
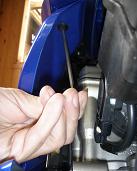
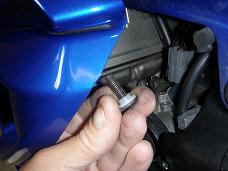
2) Unscrew the 4 screws from their plastic clips in the bottom of the lower front
corner of the cowling.
Then remove the clips and the plastic plate which lies on the inside.
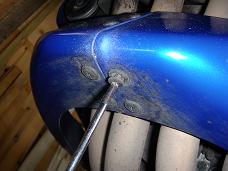
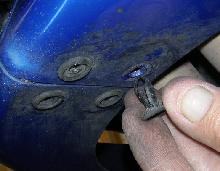
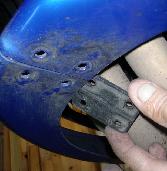
Remark: Other type of lower cowlings come fitted with plastic nuts and bolts rather than the screw and clips.
3) Remove the 2 plastic clips at the lower front corner of the cowling. To release them,
press hard with e.g. the blade of a flat screw driwer on their inside end.
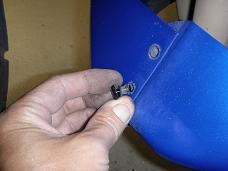
4) Unscrew the 20 mm long 6 mm bolt at the rear lower corner of the cowling.
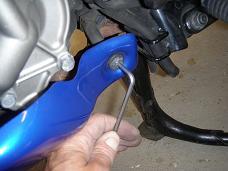
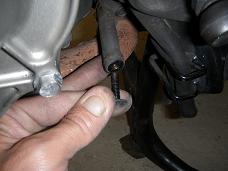
Tip: Whenever possible, leave bolts, nuts and screws in their original positions while you continue work. Then you have them in the right place for reassembly.
5) Unscrew the bolt at the center of the cowling, and lift the cowling away.
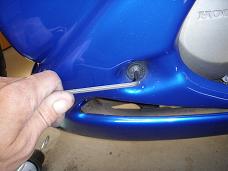
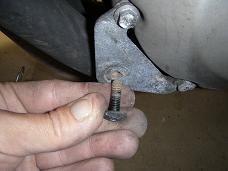
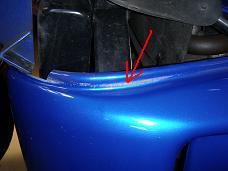
6) Inspect the cowling and the mounts for any damages which might need repair. As the
images below shows, there were three issues to deal with on the lower left cowling after
the first 27.000 km:
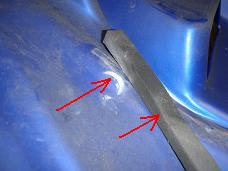
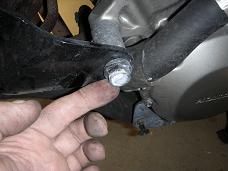
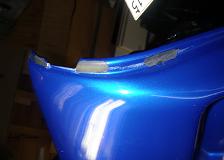
A 1 mm deep half circle had been scratched into the inside surface of the cowl, i.e. almost half throug the plastic! The cowling has been scratching against the bolt head shown on the second picture (above). Furthermore the piece of damping rubber glued to the inside surface has clearly been dislocated from its original position, maybee this has been the cause of the first problem.
The third problem was scratch marks on the upper edge, indicating that the upper and lower cowls have been scratching against each other, probably causing some of the buzzing noise I have heard in some revolution ranges.
To solve the problems I cut out a few patches of rubber from an old bicycle tube and glued
them onto the cowl as shown on the pictures below (using 10 seconds glue, Loctite Super Attack
cyanoacrylat).
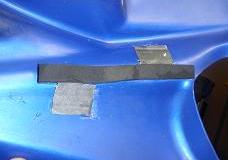
Installation is simply to reverse the removal procedure. Be prepared for some difficulty
getting the bolt in step 1) remounted, as you have to allign all the holes correctly.
I use a piece of stiff metal wire for the allignment, then hold the cowls steady, remove the
metal wire and screw in the bolt.
Tip: Remember to smear the threads on bolts and screws with copper grease before you remount them. Then you will have an easy task, next time you have to disassemble.
A GT version of the Honda CBF1000A came on the market in 2008 equipped with lower fairings
and a three-box hard luggage system.
The shape of the right side fairing does not allow sufficient access to perform oil filter
change without removing or at least releasing it at the bottom.
 While waiting for pics from Jumbo and/or alan sh we will have to do with GT pic
found on the net.
Jumbo and alan sh from the www.cbf1000.com forum have both made descriptions of how to handle the RH side fairing when exchange the oil-filter on the GT model:
Jumbo wrote:
"I have discovered a quick way to change the oil filter on the GT:
Next time you replace the filter leave the filter cover off permanently. Getting at the cover
bolts is the awkward bit and needs the fairing out of the way.
No cover = no awkward bit.
Once the cover is no longer installed you can just about get a filter removal tool in there
with the bottom part of the fairing loosened off and held flexed out a little with a block of
timber. The oil filter itself, once off, can then be got out of there by a little juggling.
I can't see what use the filter cover is when you have a lower fairing hiding it. Without
the fairing the cover may have some appearance purpose, but it's not important. Most engines
have the filter open to the elements. Besides, without the cover you get a little more oil
cooling for free.
Meanwhile, I'm keeping the filter cover in a safe place in case I ever sell and the buyer
does not agree with me!
My main struggle with the lower fairing removal/installation is separating the two halves at the bottom and fitting them to the upper fairing without losing my temper and doing some damage to something (or someone)........ It's a personal thing that needs some Zen time!"
alan sh wrote:
"Taking off the RH side fairing. You need to do this to get at the oil filter. So, two bolts at the side (allen key), the crash bungs if you have them fitted(19mm bolt) and 1 bolt (long allen key) underneath the top of the fairing at the back. That one is a bugger (more later on that). At the front, take off the two plastic bolts underneath - these have a little screw in them which you undo and prise almost out, then the bolts come out OK. Two at the front (you can leave the other two in). These have a plasic cap on which you pull back and then the bolt comes out. It's hard to explain, but easy when you know.
OK - fairing is off. While it is off, check the seal at the top. Normas had worked loose in a couple of places and there were some small stones embedded in it. So, a bit of superglue and a wipe down and it's put aside for later.
Now for the fun bit - reinstalling the fairing. It's that top bolt which causes all the problems. My solution is to remove the tank so you can see down onto it. So, seats off, then two bolts at the front (10mm) and the one at the back (10mm). Remove them and slide the tank back, lift it up and prop it on the LH frame so you can see into the RH fairing at the back.
Offer the fairing up and click it in place at the front top. Put the two screws in and make sure the front bottom bits which connect the two halves are aligned. Take the last screw and push it through from underneath. Look down onto the screw hole as you do this and you can get it aligned easily. Use a long allen key to get it screwed in.
Put the crash bung back on (if you had one) remembering to put the spacers in the right place.
Put the tank back in place - do the front nuts up after you push the back bolt through but before you tighten it up. Then the seats back on."
Thanks Jumbo and alan sh for your contributions!
Finished.
© Copyright 2009 FireBladerDk - Last updated 2022-02-12